By Robbie Ferri, Cyclist, Personal Trainer, and Group Exercise Instructor.
When it comes to cycling, one thing that has become huge in the cycling world is training indoors. We have smart bikes, which give us an amazing experience, and we also have turbo trainers that we can throw our bikes onto and get miles in without having to go anywhere.
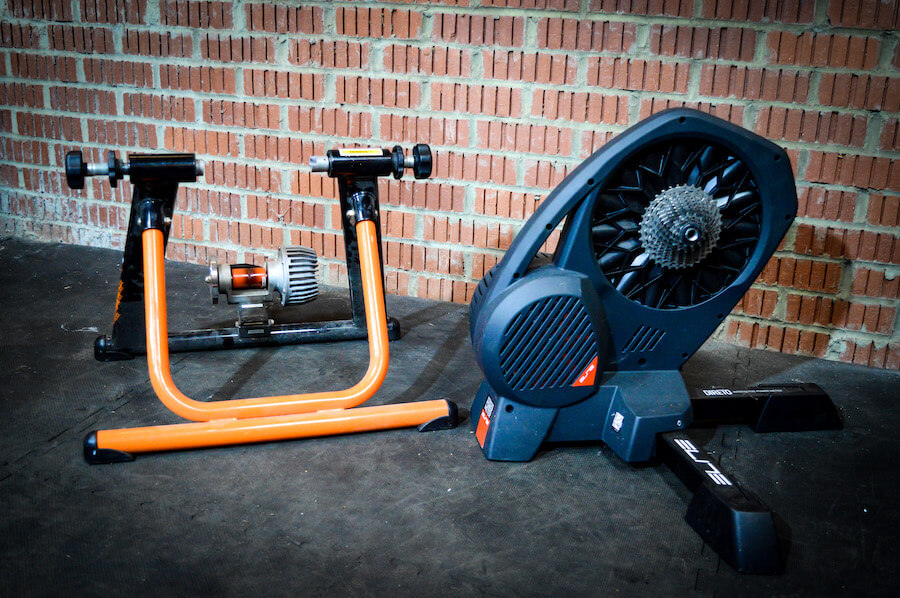
As smart technology has improved, though, we have noticed the price of these setups slowly creep up, and for an all singing and all dancing turbo trainer, you can expect to pay a minimum of $600. This is a lot of money, and not all of us can or want to pay that much for something we might only use once or twice a week.
It doesn’t have to be that way, and what a lot of people don’t know is you can give a cheaper turbo trainer the same technology. It’s a very simple process, and in this article, we’re going to tell you all about how to take a basic wheel on
Want to See it in Action? Check My Video!
The Advantages & Disadvantages of a homemade Smart Trainer.
Before we start, it’s important to understand that with a homemade setup, you get a different experience and lose some of the features. The first thing to mention is data. Unless you are using power meter pedals in your setup, the data won’t be as accurate as a direct drive turbo trainer with a power meter installed.
Secondly, you won’t get auto resistance features which you would typically get on a direct drive smart trainer. On a smart trainer, you can put workout profiles in, and the resistance will automatically adjust for you. This is a feature you don’t get going down this route.
What will you need?
There are a few different ways you can go about upgrading your basic turbo trainer. There are some things you will require to make it work and some optional extras that will hugely improve the experience. We are going to speak about both.
Required
Optional
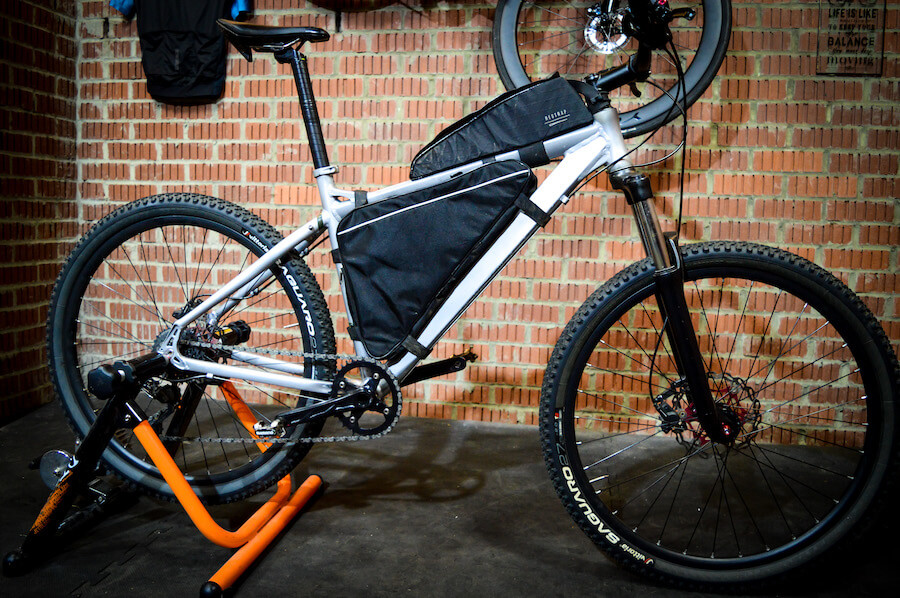
Step One – Step up
The first thing you’re going to need to do is to get the
Speed Sensor
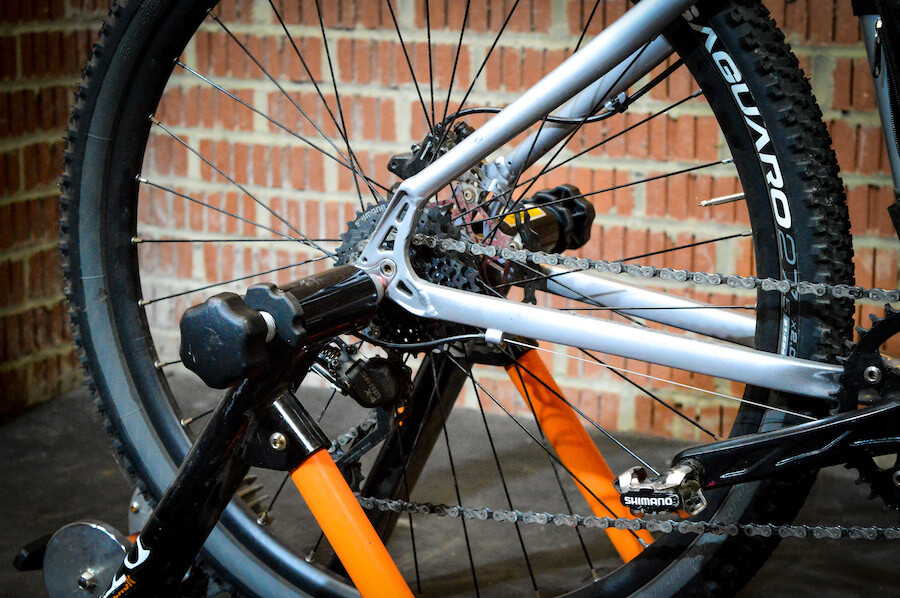
Next, you will need to add the speed sensor onto the rear wheel. Typically, most speed sensors go onto the inside of the wheel and attach to the hub. This is an easy part to attach, and you will need to put a rubber pad down, and the sensor goes on top. Then you use bands to secure it in place.
The speed sensor’s job is to count the rotations on the rear wheel and how fast it is moving so it can estimate a power output on the application. It’s not the most accurate system, but it does work and gives you data you can train from.
Other Sensors
If you have any other sensors, then here’s the time to get them on. The cadence sensor you will need to connect to the pedal arm. If you’re using power meter pedals, then you will need to have these attached now.
Tablet, Laptop, or Phone
You’ll also want to find a place to sit on your tablet, phone, or laptop. We recommend putting it somewhere close enough to reach but not that it will be in the way if you’re sprinting. If you are using a phone, a great idea is to use a
Step Two – Connecting the Technology
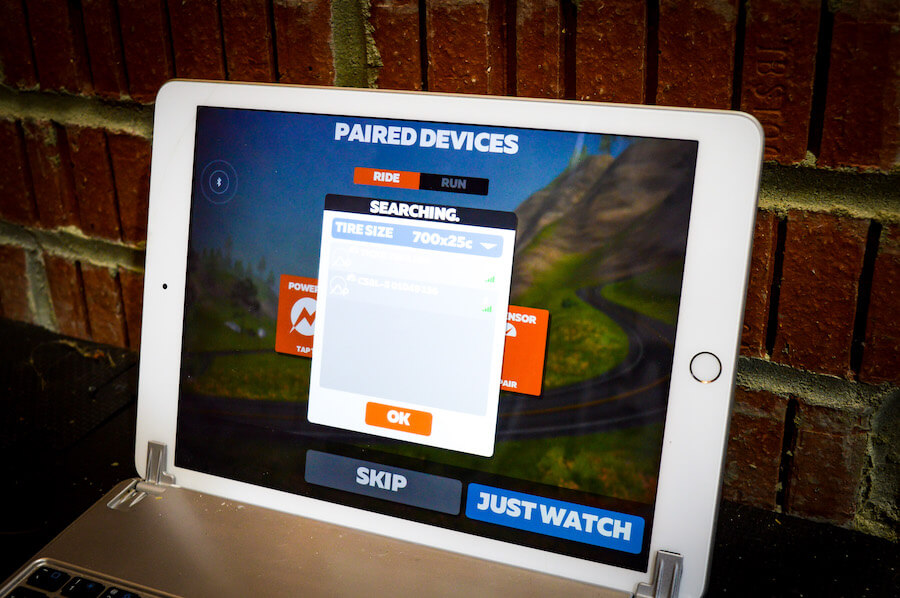
Next, we need to connect all the technology together so it can communicate. Depending on your application, it will be slightly different, but typically it will be very easy. As discussed before, we’re using Zwift.
You will need to download the application and then create an account. You won’t have to pay straight away as they give you a 25km trail period. Once you have signed, it will take you to the connection screen. To get everything working, you will need to start riding the
The device will automatically pick the sensors, and you will have the option to connect to them. If you use Bluetooth sensors, all tablets and phones will connect to this with no problem (you can also stream zwift to tv from your phone, tablet, or pc). If you are using Ant+, you might need to use a laptop with an Ant+ dongle to connect. We highly recommend Bluetooth over Ant+ as it’s much better when it comes to connectivity.
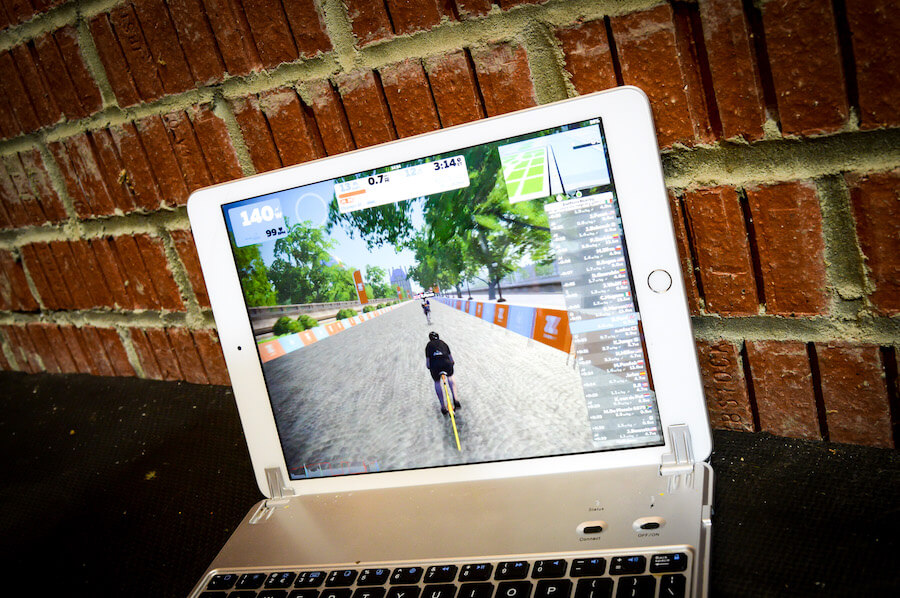
Step Three – Testing
The next thing we need to do is ensure it works. So get into the world of Zwift and start pedaling. On the screen, you will see a few different data fields, but the one we’re going to concentrate on the most is the power, and this is displayed in watts. You will see it constantly changing as you’re riding.
To ensure the sensor is correctly working, the power figure should increase when you start putting more pressure into the pedals. So, for example, up your gears and give it a sprint, and then the power should increase. It sometimes takes a few seconds as most applications work on a three second average for better data accuracy.
If you have any other sensors connected, you should see that data on the screen too. Heart rate monitors will give you BPM (Beats per minute) data, and a cadence sensor will give you RPM (Revolutions per minute). Having the extra data of BPM and RPM makes the experience better, and you can also track your distance and
Recommendations
If you like the sound of making a homemade smart turbo trainer setup, here are our recommendations on what equipment to use. We will include all different sensors and different turbos, which we know are going to give you a great time while riding.
Sensors
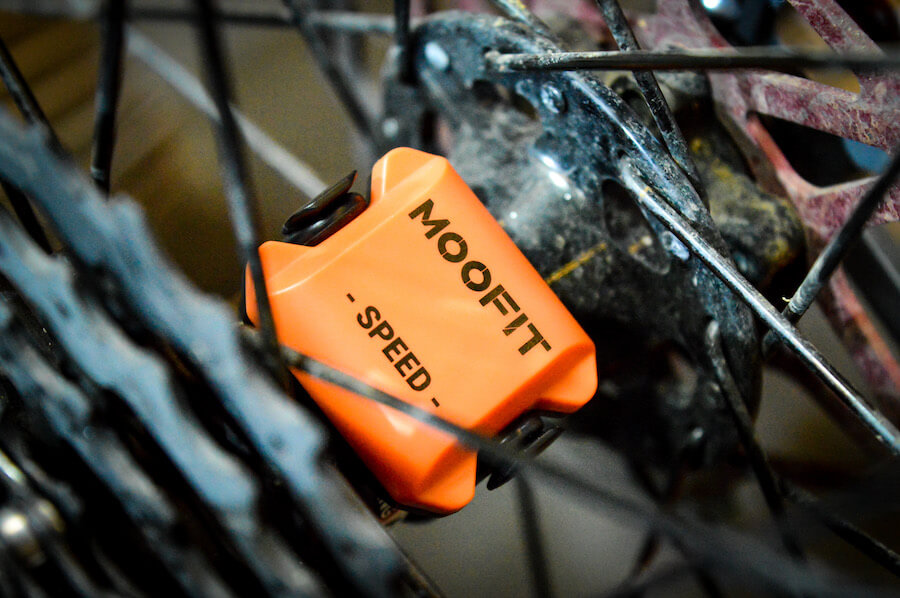
Speed Sensor
The best value for money speed sensor on the market, in our opinion, is the Moofit. It does both Ant+ and Bluetooth and is half the price of other sensors out there without any sacrifice. This is the one we are using in the video.
Cadence Sensor
Suppose you’re looking for a cadence sensor to pair up with that speed sensor. We highly recommend getting the twin pack from Moofit. This means you have both Power and RPM data to use, and also, it comes at such a low price because you’re buying them together.
Power Meter Pedals
If you plan to use power meter pedals, then you will get an excellent experience, and you will also be able to use them out on the road too. The drawback of these is that they are fairly expensive and near the same price as a direct drive turbo. The Favero Assioma pedals are incredible and provide very accurate data.

Turbo Trainers
If you’re looking for a non-smart trainer, typically, most places will refer to these as dumb trainers. Although they all look very similar, they can be completely different, so we have a few different recommendations for you here.
Alpcour Bike Trainer
The Alpcour
Health Line Bike Trainer
The health line
CXWXC Trainer
The CXWXC trainer is quite unique and had to be in our top three trainers. It has six resistance levels and is very easy to use. We love the flip clip, which means getting the

FAQ’s
How can I make my indoor trainer more comfortable?
The Easiest way to make the indoor trainer more comfortable is to firstly get the bike fitted to you or invest a bit of money into cycling bib shorts and a better saddle.
Can you ride Zwift without a smart trainer?
Unfortunately, you can’t use Zwift without a smart trainer or some form or sensor to communicate with the application.
Do you need both a Speed and Cadence Sensor for Zwift?
A big misconception is you need a cadence sensor for Zwift when actually you don’t. A speed sensor is enough. We highly recommend getting a cadence sensor as RPM is great data for your training.