CPT & Indoor Cycling Instructor
Cycling indoors in the past decade has become huge. We have people using turbo trainers and exercise bikes and even remotely participating in online spin classes on singing and dancing spin bikes. It’s much easier to get your
Here at Girl
- Do
Bike Trainers Need Maintenance? - Why Is It Important To Maintain An Indoor
Bike Trainer? - How To Maintain An Indoor
Bike Trainer - How Often Should You Clean Your
Bike Trainer?
Types of Indoor Trainers
Indoor trainers come in a few different types; depending on your use, you will get a very different experience. Here’s what you need to know:
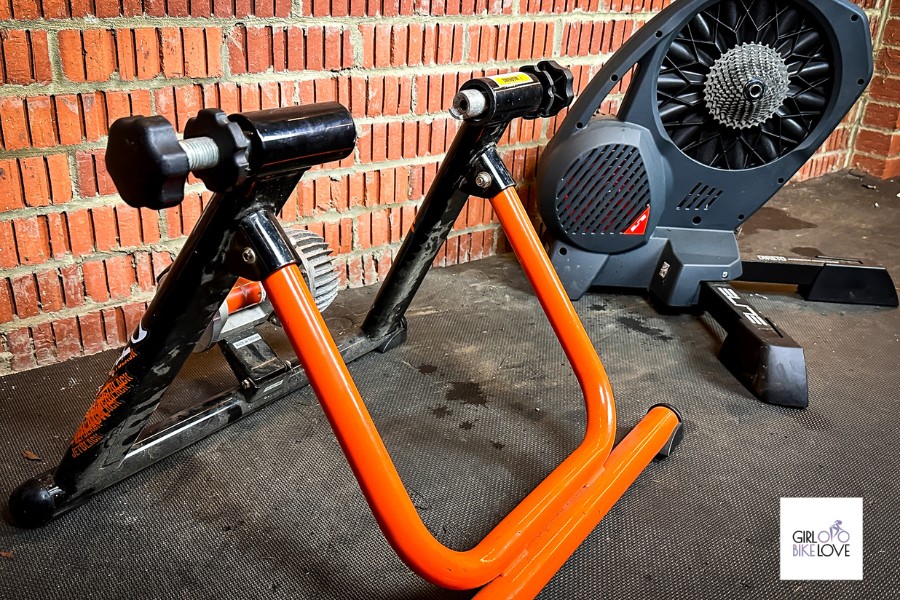
1. Wheel On Trainers
The first type we call wheel on trainers. These are where you attach the whole
They are very cheap to buy, take literally minutes to set up and start training, and fold away, making them very easy to store. The drawbacks of these wheel-on trainers are they are very noisy, wear through your components quickly, and only a select few offer smart capabilities.
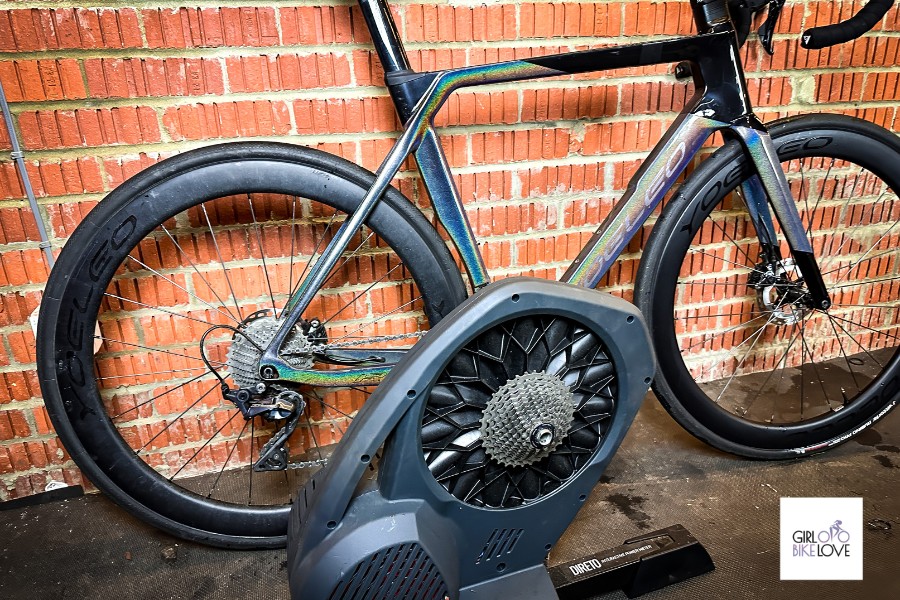
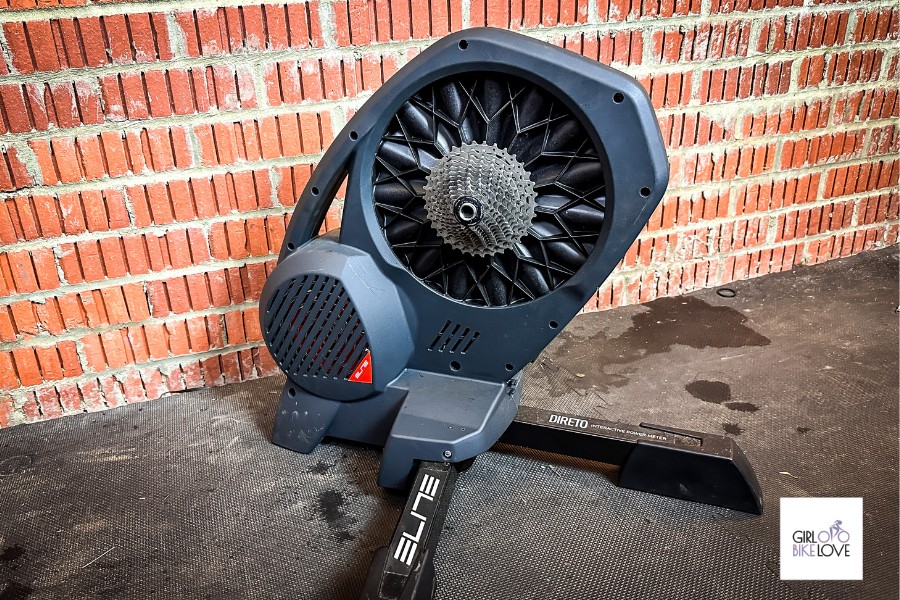
2. Direct Drive Trainers
Direct drive trainers are where to attach the
They give an amazing experience and are very quiet compared to wheel-on trainers. Most of them can automatically change resistance, and some even can be linked up with additional parts to simulate climbing. The drawback of these is they are more expensive, and getting your
You can also read our detailed guide about the differences between a direct-drive and a wheel-on trainer and how you can pick the best for you.
Do Bike Trainers Need Maintenance?
Anything mechanical that you own will require maintenance. There’s no avoiding it. You can do a lot for your
Why Is It Important To Maintain An Indoor Bike Trainer?
There are many reasons why you will want to stay on top of our
1. Personal Experience
A well-maintained turbo trainer will give you a much better experience when being ridden compared to a poorly maintained turbo trainer. It’s smoother, quieter, and much more responsive when going into those sprints and working at higher resistances.
2. Longevity
The first thing to mention is longevity. The better you can maintain your trainer, the longer it is going to last. I have had a trainer last as little as a year for me, which I could have looked after better. Compared to the same model trainer, which has lasted twice as long and continues to perform just from servicing it.
3. Performance
As someone who has spent a lot of time on turbo trainers, I have found that you can produce much more power if your trainer is well-serviced and well-looked after. The smoother the machine can run, the better experience you will have when it comes to saving wattage and smashing those personal bests.
4. Noise
Turbo trainers tend to be a little noisy, and although there are many ways to reduce turbo trainer noise, if you don’t look after it, it is going to get a lot noisier. By staying on top of the maintenance, you will find everything to work much quieter and feel much smoother.
5. Safety
Another factor that is very important when it comes to indoor
How To Maintain An Indoor Bike Trainer
Now for the fun bit. Next, we are going to speak about how you can maintain your trainer. We recommend going through this process every two weeks if you ride your
This is the process I have done for years, and it not only maintains your indoor
What Will You Need?
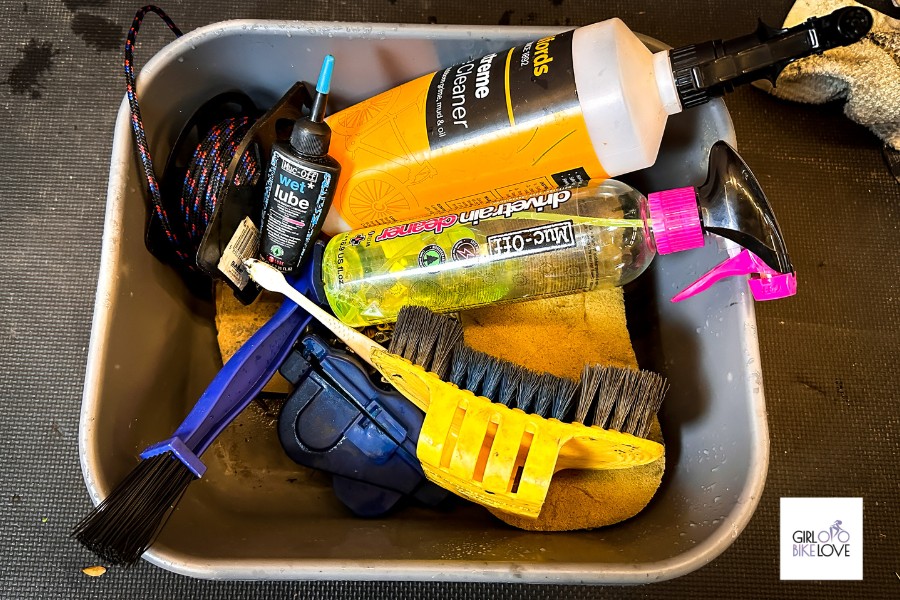
To successfully maintain your indoor
- Bike Cleaning Wash
- Sponges
- Brushes
- Degreaser
- Allen Keys
- Screwdriver
- Cleaning Cloths
- Form Of
Bike Lubrication - Bike Stand (Optional)
- Chain Cleaner (Optional)
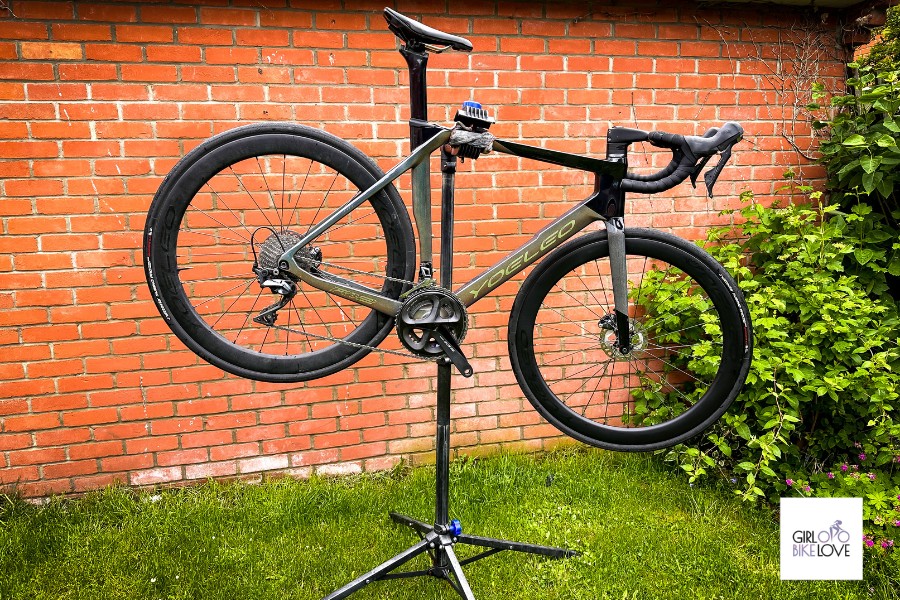
Step One: Remove The Bike From The Trainer
Before we even think about looking at the turbo trainer, we need to get the
Step Two: Clean And Degrease The Bike
Next, you need to get the
Once you have rinsed the
After all is degreased, rinse the
Again now, rinse the
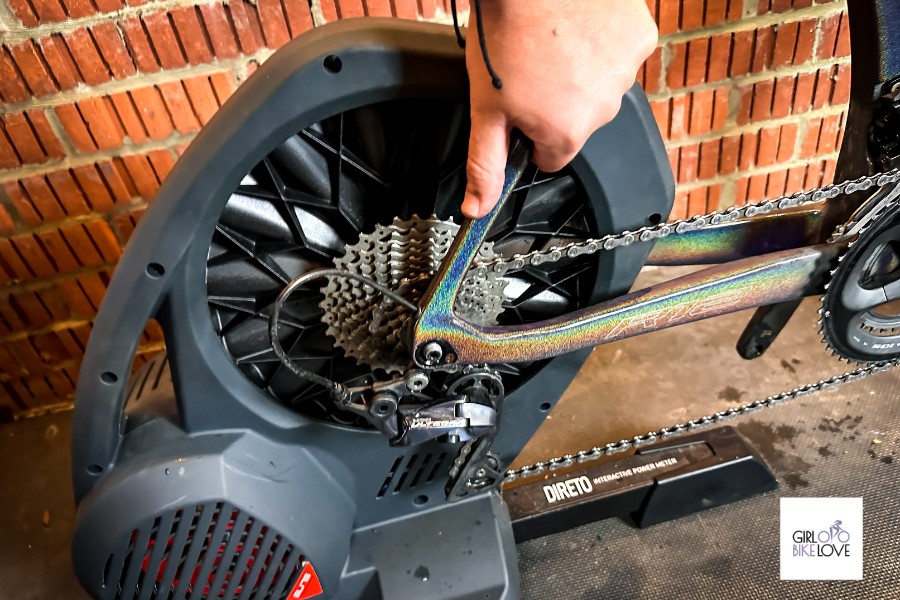
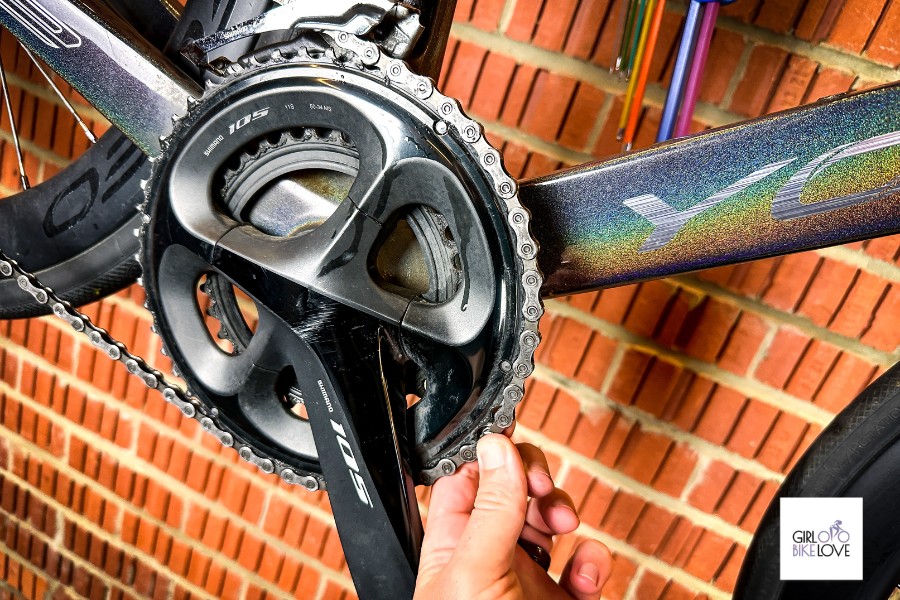
Step Three: Check The Bikes Components
Next, we need to check the
- Chain: Check stretch by either using a chain checker or pulling the chain on the chainring.
- Cassette: Check for shark teeth on the rear cogs indicating excessive wear.
- Chainrings: Check for shark teeth on all of the chainrings.
- Frame and Forks: Check for any cracks or damage the trainer might have caused.
- Handlebars: Check for any corrosion around the bars of your
bike .
If there’s anything that needs attention, we recommend getting it fixed now before going back on the trainer. Hopefully, it should all be ok. If there’s anything too wrong, you will notice when the
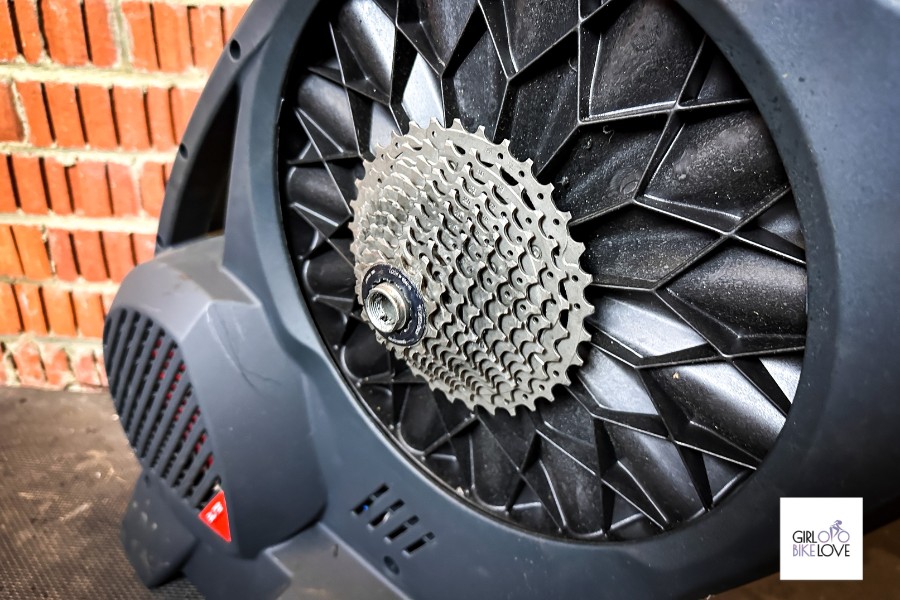
Step Four: Clean The Trainer
Now let’s leave the
Once you have gotten the majority off, you will want to look around the trainer, and there’s a strong chance you might find some oil or lube on it, which might have come from the
If you have a cassette on the trainer, a really easy way to clean it is to get a cloth and, on one side, spray some degreaser. Then thread it through between each cog pushing it back and forth.

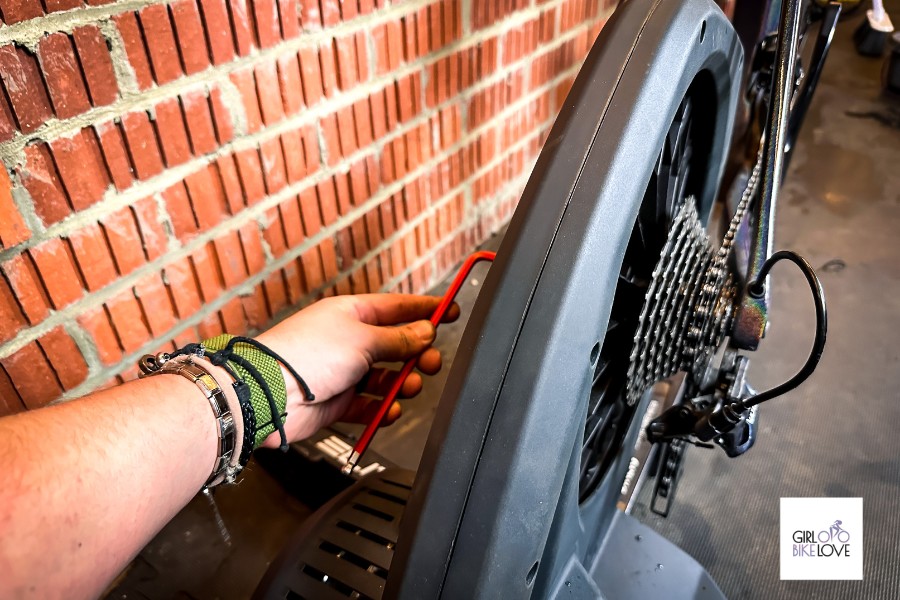
Step Five: Inspect The Trainer
It’s now time to inspect the trainer. This is important to do because sometimes you are able to catch problems before they cause any damage. Here’s what to look out for:
- Outer Casing: Look for any cracks or damage on the casing
- Power: Check the power lead isn’t damaged in any way
- Cassette: Look for shark teeth on the cassette to check for wear
- Feet: If you have adjustable feet, check they are completely level
- Belt: If you have internal access, it’s not a bad idea to check the belt and look for rips
Any issue you find might be worth contacting the manufacturer, looking for replacement parts, or taking it to your local
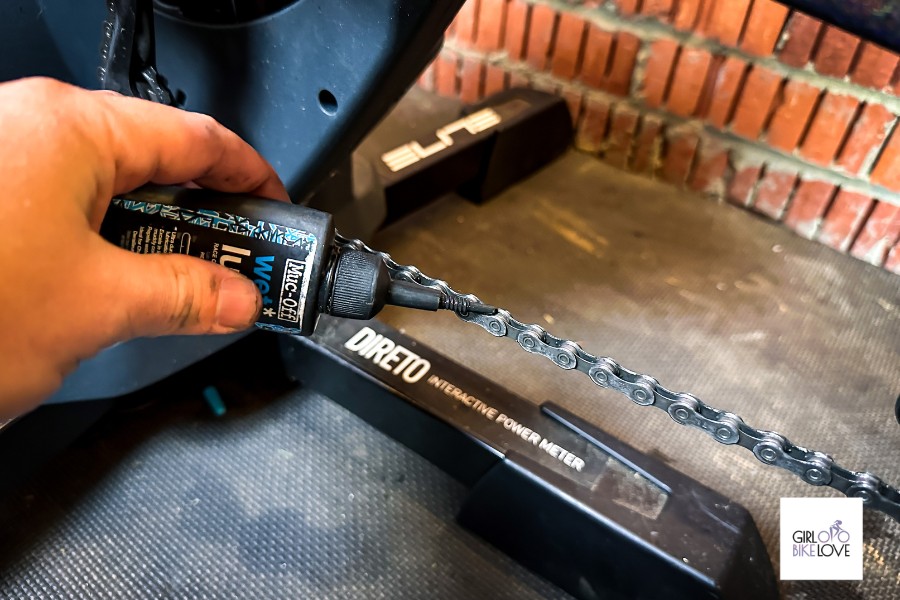
Step Six: Insert The Bike and Lubricate
Now it’s time for us to get the
Next, it’s time to lubricate the chain. The key to proper chain lubrication is to get as little on as possible but enough to give the chain free movement and protect it from getting rusty. I personally like to put a drop on each link and then run the chain through the system for around 30 seconds.
Then you are going to want to take a clean cloth and run the chain through. Any excess oil we want to remove now. There should be enough in the links for it to be lubricated to work properly.
Now it’s time to give it a test just to make sure everything is ok and works as it should.
Storing Your Indoor Bike Trainer
When it comes to storing your
A Final Note
Indoor
Frequently Asked Questions
How often should you clean your bike trainer?
We recommend every two weeks if you use the
How do you lubricate a bike trainer?
Typically a
Do indoor bike trainers fit all bikes?
It’s always worth checking before you buy an indoor
Do I need a mat under my indoor bike trainer?
Having a mat has a lot of benefits, and we highly recommend it. It makes the