CPT & Indoor Cycling Instructor
When it comes to cycling, there’s a lot to learn. Bikes are complex machines, and as technology grows and improves, they are not getting easier. When you buy a
There are many different types of front wheel attachments and also many other things to consider, such as braking systems. In this article, we’re going to tell you everything you need to know about how to remove a front wheel and the best practices when doing it. By the end of this, you will know the different ways front wheels are mounted, the braking systems, and how to complete the task properly.
Want to See it in Action? Check My Video!
Why might you need to remove a Front Wheel?
There are many reasons why you might find yourself removing a front wheel. It’s a job that, as a
Different Types of Front Wheel Mounting
When it comes to front wheels, there are various ways they are mounted onto a
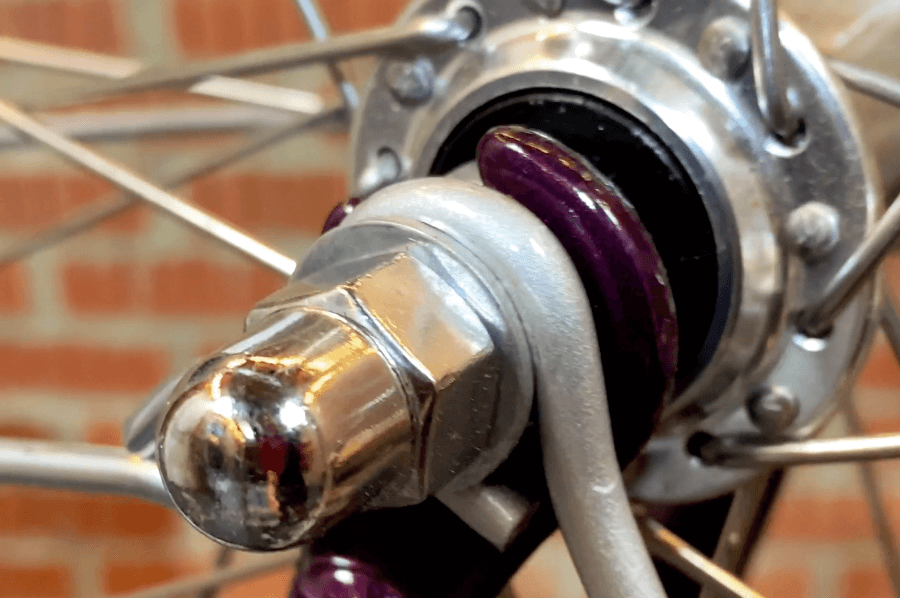
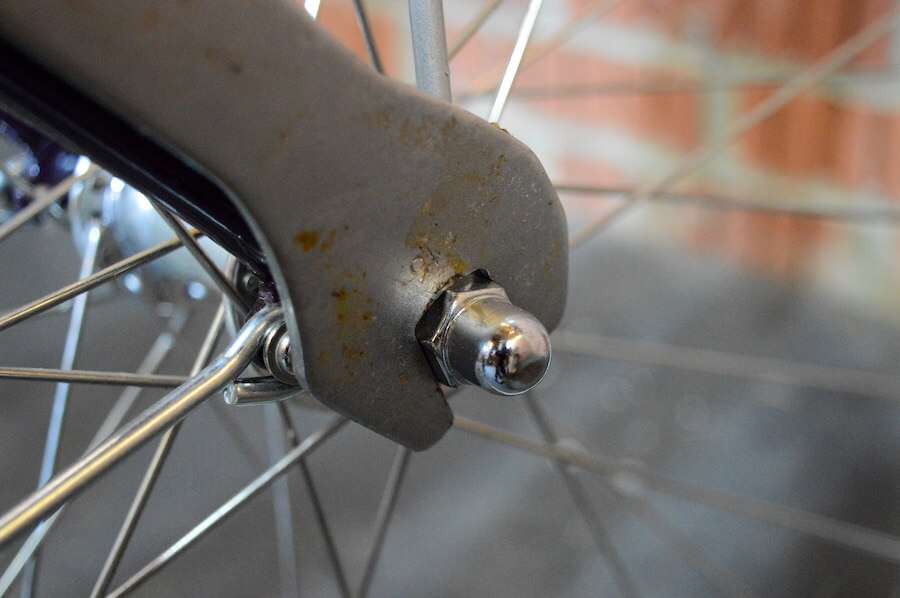
Bolt-On Front Wheel
The bolt-on system, decades ago, was what every
Tools Required: 15mm Spanner
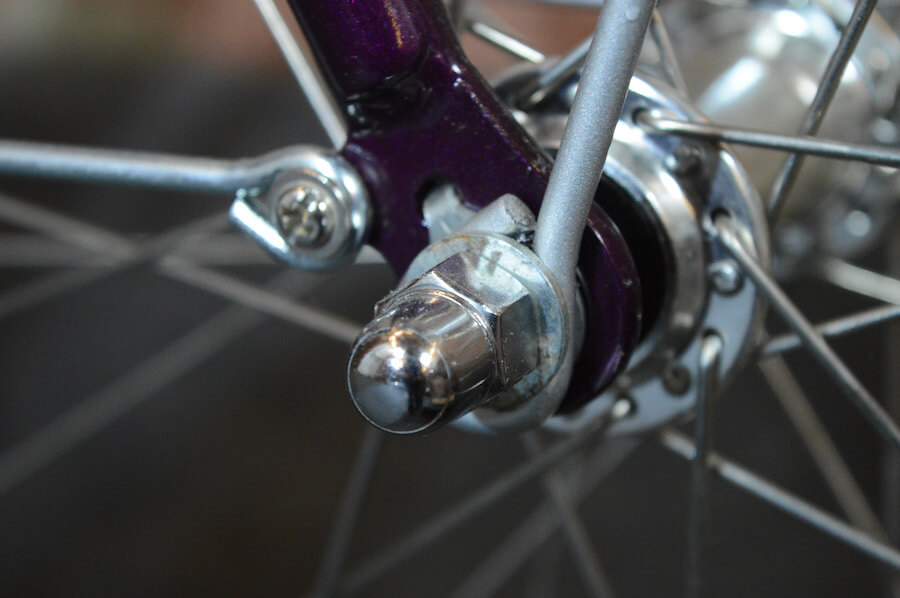
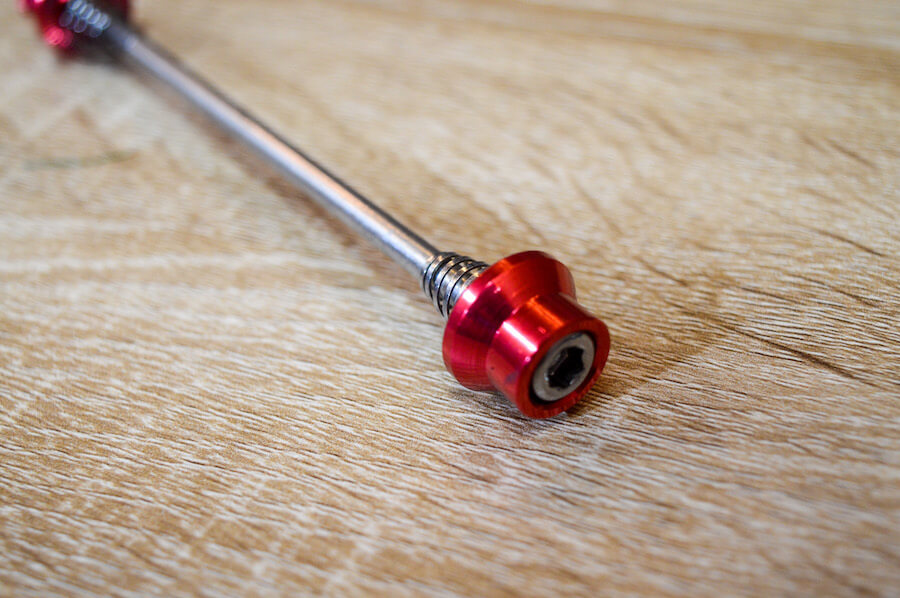
Quick Release Skewer
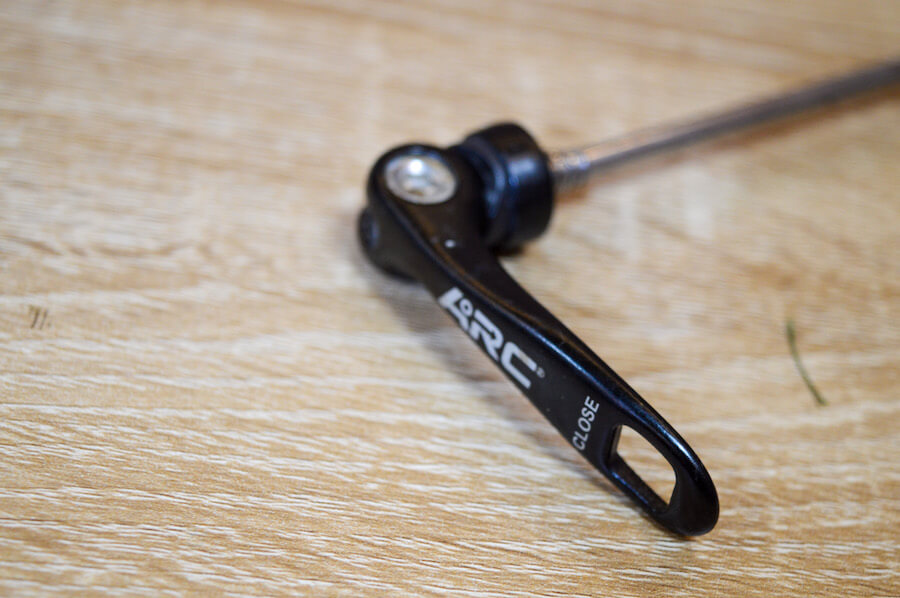
The quick-release skewer has been the most popular mounting system in the past decade. It’s really simple and requires no tools. What you have is a small handle you can tighten up until it is fairly loose, then flip it over, and it locks into place, keeping the wheel secure.
Tools Required: None
Security Skewers
Security skewers are very similar to quick-release skewers, but instead of having a small handle, you have an Allen key or specialist tool fitment. They are great if you park or
Tools Required: Allen Keys or Specialist Tool
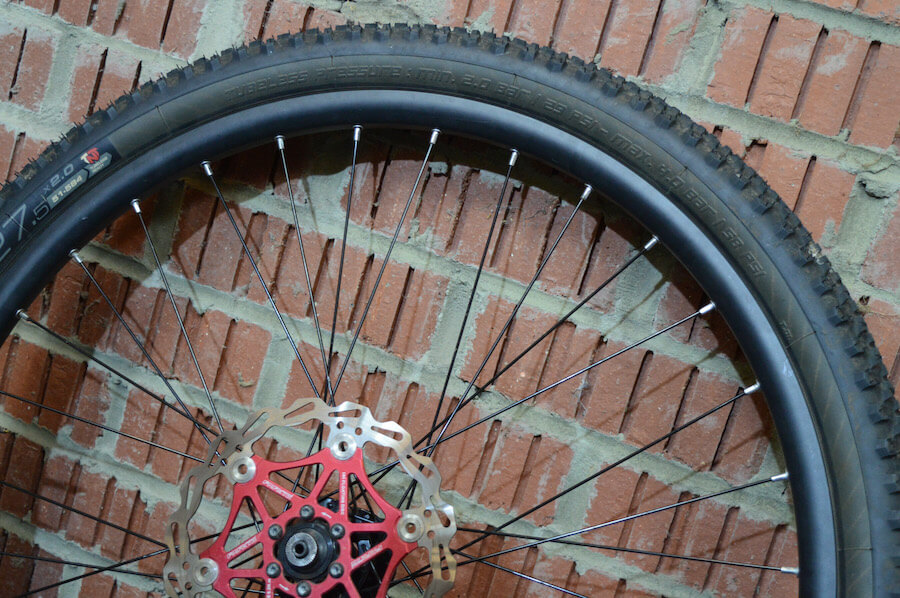
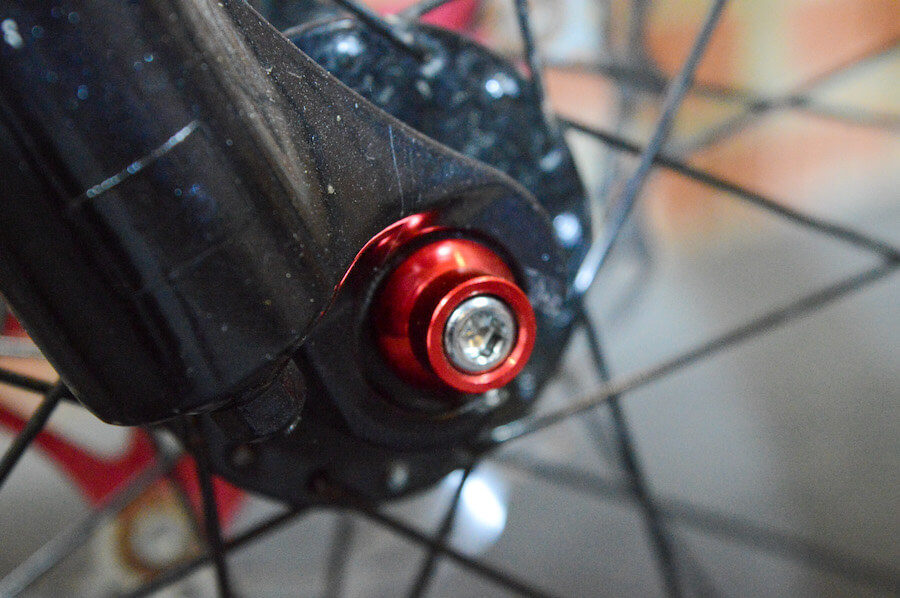
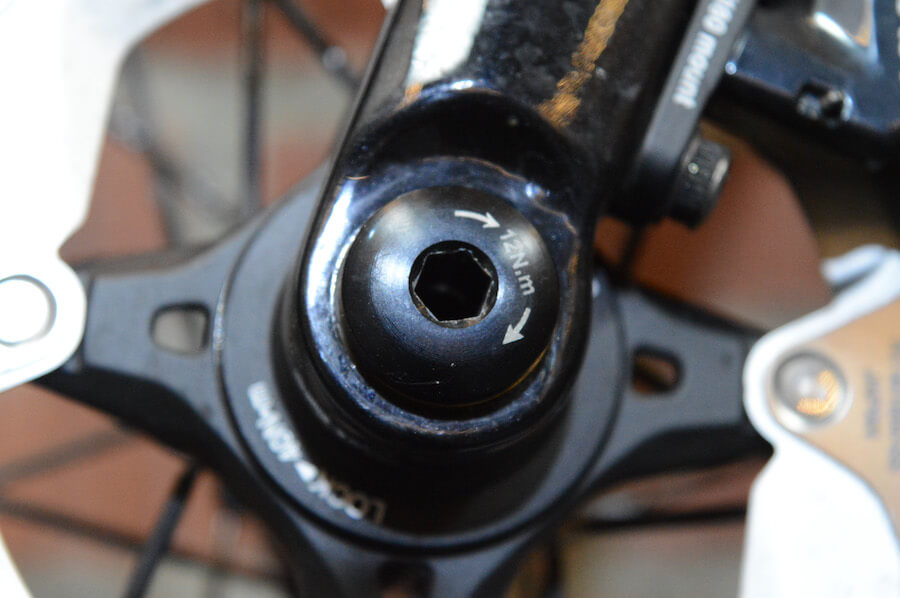
Thru Axles

Thru axles are what high-end modern bikes use. They work very similarly to quick release and security skewers, but instead of having a small axle, they have a very large axle that screws into the frame. They are very strong and ensure the wheels sit in place perfectly each time.
Tools Required: Allen Keys or None
Different types of Braking Systems
Another thing to take into consideration when removing a wheel is the brakes. Some brakes require it to be released for the wheel to come out freely and return into the
Rim Brakes

Rim brakes, typically when removing a wheel and inserting a wheel, will need the brakes putting to one side so the wheel can free fit between the pads. This isn’t difficult to do, but it is very challenging if you are unsure how to do it.
Disc Brakes
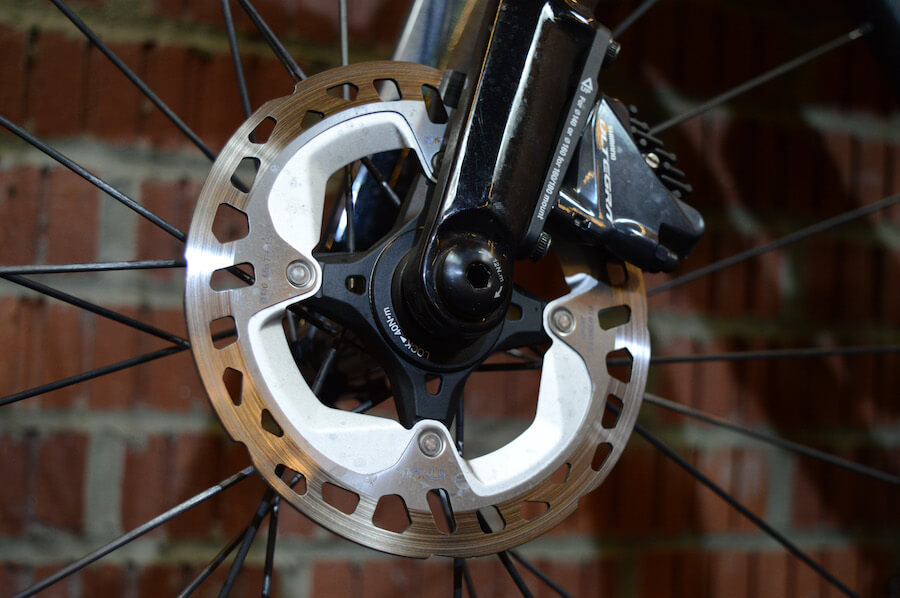
Disc brakes are much more modern brakes and are used on most types of bikes now. When removing a wheel, you need to ensure the levers are not pulled on hydraulic brakes, or you might need to reset the pistons, and you must ensure the wheel goes back to the same place it was before.
How to remove the Front Wheel of the Bike
Now to answer the question, you have all been waiting for how to remove the wheel on your
How to remove a Wheel with a Bolt on Axle
Step one: Preparation
The first thing you want to do is either flip the
Step Two: Unhook the Brakes
Now the
Step Three: Loosen the Bolt
Now it’s time to loosen off the bolt. If the
Step Four: Returning the wheel
When returning the wheel back onto the
How to remove a Wheel with a Quick Release and Security Skewer
Step one: Preparation
As we did with the bolt-on wheel, you are going to need to prepare the area. Make sure it’s a safe space, and either pop the
Step Two: Unhook the Brakes
The next step is to undo your brakes. You get both rim and disc brakes on a
Step Three: Remove the Wheel
If you are using security skewers, then you will first need to take the Allen key or skewer tool and turn it to the left to release the wheel. It will take a few turns, but eventually, the wheel will fall from the forks. Ensure when unscrewing, both these skewers do not go too far, or they will fall apart, and it’s possible to lose the internal springs.

If you have hydraulic disc brakes, you will want to make sure you don’t pull the front brake, as this will adjust your pistons and cause brake rub when returning the wheel.
Step Four: Returning the wheel
When returning the wheel, you need to reverse the process. You need to consider if you’re using rim brakes to reverse the brake release dial. If you have disc brakes, you must ensure that the brake disc does not rub against the caliper. If it does, release the wheel and put it back in again.
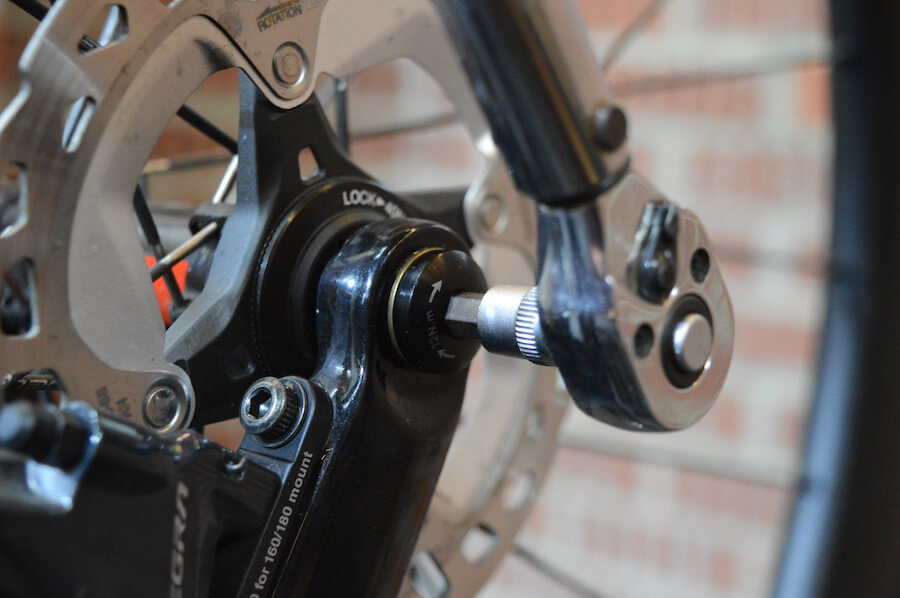
How to remove a Wheel with a Thru Axle
Step one: Preparation
You first need to prepare the area and create a safe place to work your
Step Two: Release the Brakes
Typically most bikes with a thru-axle have disc brakes. So you don’t need to worry about releasing the brakes. If you do have rim brakes, you will want to turn the release dial to free the brakes.
Step Three: Release the Wheel
Removing a through axle will either be an Allen key fitment or a handle. What’s special about thru-axles is they bolt into the forks. When unscrewing these, you are going to want to turn it to the left, and when it leaves the thread of the bolt, you will want to hold the wheel and completely remove the thru-axle from one side.
Step Four: Returning the wheel
When you have done everything you need to with the wheel, you will need to return it. With a thru-axle, you want to place it back into the
FAQs
How tight do my wheels need to be?
When putting the wheel back in and tightening it up, many people ask how tight should it be. No matter what system you’re using, you’re going to want it to be tight enough that it won’t come loose but also not too tight that it is impossible to undo when you next need to remove the wheel, or you will start to strip the threads.
What if my brakes are rubbing when I return the wheel?
Many cyclists find when they are changing their wheels, after they are done, the brakes rub. This is common on discs and rim brakes. The first thing you are going to want to do is to pull the brakes to make sure they are central.
If they continue to rub, you will want to remove the wheel and reinsert it, ensuring it’s in properly. If this doesn’t solve the issue, you might need to adjust your brakes or reset the pistons if you are using hydraulic disc brakes.
What if my wheel still feels loose even though I have tightened it up?
It’s really common when your wheel bearings are very worn for your bike wheel to feel loose even though the skewer is fully tightened. You will need to either service your hub or go to your local bike shop for them to do it. The longer you leave it like this, the worse it will get until the wheel isn’t repairable.
Check my video on Youtube!